Categories are assigned to your item in the Content Tab, found beneath the Body. A category helps organize articles under a headline and is typically used for ‘news’ and ‘blog’ templates. In the eCommerce module, categories make it easy to divide your product offerings into broader groups. Categories also allow web pages to list items automatically by category.
You can create multiple categories in All Tasks > Article Module > Categories or via Quick Setup (click the + Add New button)
You will find Categories under the Article Module, eCommerce, Directory and Calendar Sections of the All Tasks Menu.
Click on Categories under the appropriate section.
When you create categories from the Category Editor, you can set all category attributes.
NOTE: Depending on the section you are working on, the content may vary from the instructions shown below.
- In the Manage Items toolbar, click Add New Category.

- In the Category Editor, complete the following Content Tab fields.
- Active - Select to make the category active across the website.

- Name – Create a brief, but descriptive name. Use lower case characters, and dashes in place of spaces. This name will not display on the website. For internal use. Required field.
- URL - Enter the direct URL for this category
- Title - The title displays on the public website. Should be similar to the name. Required field.
- Kicker - A sub title for your category. This will only display if the template directs it.
- Summary – Optional text that displays below the title.
- In the Media tab, add image(s) to show on the Category Page, if desired. Images appear above the Title.
- Save.
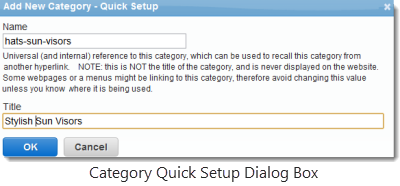
Creating a category using Quick Setup in an item editor
If you need to add a quick category, you can use the Quick Setup tool within the article's Content Tab. Quick Setup creates a limited feature, but functional, category whose fields can be completed later.
- Click the Add New button next to the Category field.
- In the Add New Category-Quick Setup dialog box, enter a Name and Title (see entry instructions above).
- Click OK.
The Category is created and applied to the article.

Re-Ordering Items in the Category
To view all of your categories, return to Categories in the module you are working with.
The list view will open.
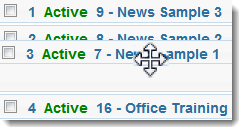
You can re-order Articles or Products within a category by clicking on the category you want to re-order. Select the Articles or Products tab. Every item assigned to the category will be displayed in the box. The item most recently assigned to a category will appear at the top of the list, but you can manually change the order.
- Locate the item you want to re-order in the list and hover over it.
- When you see the crosshair, click and drag the item to its desired position.
- Save.
Featured articles - If you have designated an article in the category as a "Featured" article, you cannot move it down on the list. It will always display first. You can uncheck the Featured box on the article to allow re-ordering.
Modifying and Deleting Categories
Categories can be deleted and modified by returning to the Category List Editor.
Items, such as webpages and menus, may be linked to categories and will be impacted by modifications and deletions. Ensure you know which items are linked to a category before making changes.
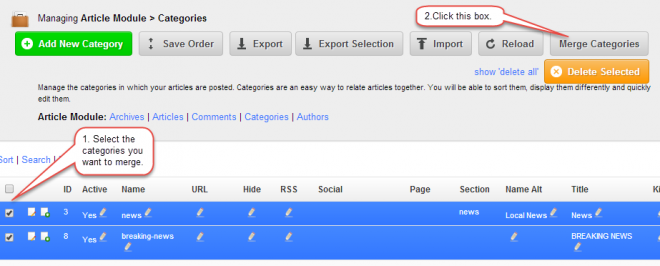
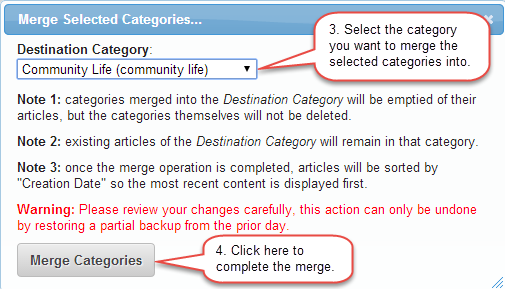
Merging Categories
You can select multiple categories and merge them into a different category