Editing Content
We recommend opening two windows or tabs in a browser, i.e. Google Chrome, when editing your website. The first window is your website as viewed by a visitor (www.yourwebsite.com) and the second is your website's Admin Panel (www.yourwebsite.com/admin).
After you log in, click back to the live site and reload/refresh the page. When the two pages are communicating with each other, small editing links will display on the live website and allow you to edit items and pages from the live site. You can also edit items from List View, or by clicking Edit at the bottom of the live site.
From list view, click on the name of the item you want to edit. To open List View, Click on the Icon for the item (article, product, etc.) you are working on in your shortcut menu or in All Tasks.
When you click on a Quick Edit link, an edit screen will appear so you can quickly and easily correct errors or make minor edits. Live Editing allows you to instantly modify text directly on the live website page.
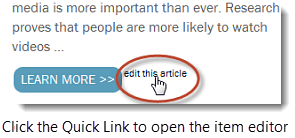
Using Quick Links to access edit screens
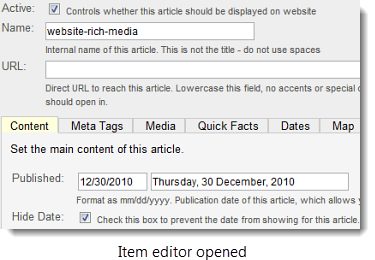
Small editing links display on the live side of the website when you are logged in as administrator. Click these Quick Links to open the full edit screens of articles.


Using Live Editing to edit items directly on the page
Pencil icons display on the live side of the website when you are logged in as administrator. Use these Live Edit buttons to directly modify items, like headlines or body text, without opening the item’s full editing screen. To use Live Editing:
- Click the Pencil icon.

- Click in the item’s editing box to display the floating edit toolbar.
- Modify text and text formatting, as desired.
- Click the Save icon to commit the changes or click the Cancel button to exit editing. If the formatting toolbar is in the way, just click and drag it to the side so you can save. By clicking the stick pin icon, you can keep the formatting toolbar from moving around.
 |
 |
Watch a video about using Live Edit and Quick Edits
From List View, you can edit certain item attributes directly from the list, such as making an item active or changing a headline.
- Click the pencil next to the attribute you wish to edit.
- In the editing box that pops up, make changes.
- Click the Save icon to save changes or press the Esc key to exit editing.

- Press Tab within the textbox to save the value and move to the next editable field to the right.
- Press Shift + Tab to move to the next editable field to the left.
- Click the Quick Edit option pressing Tab key moves vertically to move up and down a row to make edits.
- When the Quick Edit option is selected, pressing Tab within the textbox saves the value and moves to the field in the row below.
- When the Quick Edit option is selected, pressing Shift + Tab within the textbox saves the value and moves to the field in the row above.

Do not use Quick Edit on hyperlinked items, such as headlines linked to a landing page. Changing the text will create broken links. Always click on edit this article/product or select it from the list view.

