LVSYS provides four system groups, and automatically assigns contacts to the groups based on activity. You can also create your own groups and assign contacts as desired. A contact can belong to multiple groups, so use contact Groups to organize your contacts to suit your needs.
LVSYS’s default groups and the activities that trigger their group assignment are:
Customer – Visitors who place orders are automatically assigned to the Customer group.
Contact – Visitors who fill in a form become part of the Contact group.
Commenter – Visitors who submit a comment to your site are tagged as Commenters.
Member - Registered members automatically become part of the Member group.
Manually Add a Contact to a Group 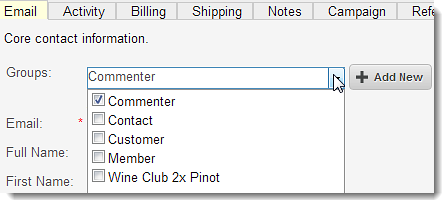
To manually assign a contact to a group:
- Open the contact in the Contact Editor.
- In the Email tab, open the Group field menu.
- Select additional groups to assign the contact to.
To remove a contact from a group, deselect the group. - Save when finished.
Creating a Contact Group
You can create your own Contact Groups to track and organize your contacts. Custom contact groups can be manually assigned to contacts. You can also attach a custom group to a form so that visitors who complete the form are automatically assigned to the group when they submit. Create groups via the Contact Group Editor or by using Quick Setup in the Contact Editor.
Creating Groups with the Contact Group Editor
Create a custom group by going to Contact Groups in All Tasks.
- Click Add New Contact Group and complete the fields as follows:
- Name - Enter a name for the group.
- Discount – If you sell items on your website and want to offer a group discount, enter a discount amount. Discounts are percentage values, but are expressed in hundreds in the field. A discount of 10.5% should be entered as 1050 (10.50 x 100).

Creating a Group with Quick Setup
Use the Quick Setup feature in the Contact Editor to create a group on the fly. Quick Setup allows you to name a group, but you cannot enter a group discount.
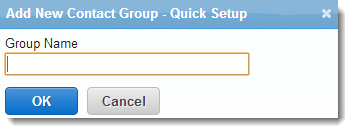
- From the Contact Editor window, click Add New next to the Groups field.
- Enter a name for the group.
- Click OK.
- The contact is automatically added to the group.
- Click Save to maintain the contact as part of the group.
- If you do not want the contact to be part of the group, click one of the Cancel buttons (Cancel & Reload or Cancel & Return to list).
The Contact Group is available to use for all of your contacts.
 |
 |
|
| Click Add New | Enter group name |