
It's easy. Here is the step by step process to change your favicon:
1. Make a 16x16 image in either: ICO, PNG, or GIF format
Make sure to select the format supported in the browsers most used by your audience. Please refer to this Wikipedia article for up to date information regarding favicon and supported browsers: http://en.wikipedia.org/wiki/Favicon
2. Upload the image to your photo folder
Go to All Tasks->Files->Images and upload your icon. Image upload instructions are here.
3. Update the Meta Head section of your website.
Go to All Tasks->Web Site->Global Settings->Page Settings->Meta Head (see screenshot below) and add (or modify) the existing code and click Save.
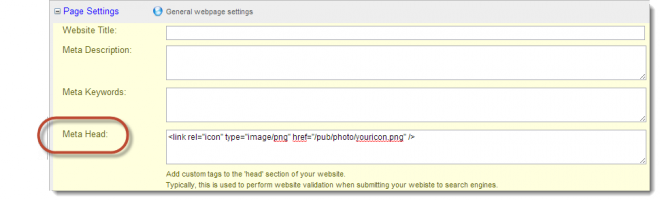
<link rel="icon" type="image/png" href="/pub/photo/youricon.png" />
It's important to match the image type with the image extension, or it won't work.
Also, these are case sensitive, make sure to have exactly the same letter casing as the uploaded photo.
4. Refresh your browser.
Refresh your browser and check to see if the new icon is displaying. Please note that your browser may cache the prior icon for some time. Use a different browser to check if you have done many updates within the past few minutes.