By assigning attributes to products, you can modify a product based on color, size or other variations. Attributes will differentiate the products and allow you to provide a unique SKU for each variation, as well as unique inventory management on the items.
If you are using the Quickbooks import feature through Live Desktop, each unique product will be tracked with a different item name/number when exported to Quickbooks sales and inventory.
In this example, we will create the product "Super Shirt" with two different attributes, color and size. Let's assume Super Shirts come in two colors (black/silver & green) and two sizes (small & medium) for a total of four different products.
Creating Attributes
To create attributes, go to All Tasks < eCommerce < Attributes
Two attributes, size and color, have been created and are listed.

To add additional attributes, click Add New Attribute and the following screen will open.
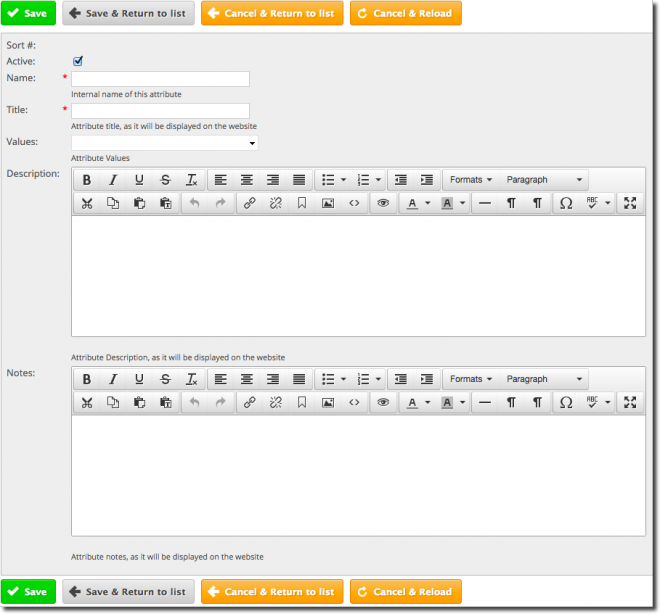
Complete the fields below.
Name (required): This is the internal system name, Lower case and no special characters.
Title (required): This is the name displayed on the site
Values: Select the attribute values for this attribute, if desired, See All Tasks > eCommerce > Attribute Values to create values.
Description (optional): This is a description of the attribute (i.e. “The color for all shoes).
Notes (optional): Internal notes for extra description.
Creating Attribute Values

Complete the fields below:
Active : Select to display this value
Name (required): This is the internal system name, Lower case and no special characters.
Title (required): This is the name displayed on the site
Parent Attribute: Select the appropriate attribute for this value, i.e. size or color.
Description (optional): This is a description of the attribute value.
Notes (optional): Notes for the attribute value.
Creating Products
Refer to http://help.lvsys.com/training-ecommerce-add-products to create your product. When you create a new product, it becomes a Parent Product. If you want to add variations for the product, click on the Sub SKUs tab. Here you will add Children, one for each variation of the Parent Product as defined by the attributes/values.
Click Add to set up the first Sub SKU. Enter the SKU# and UPC# and then assign as many attributes as you like to the product. Save each child product separately, or click Save All.
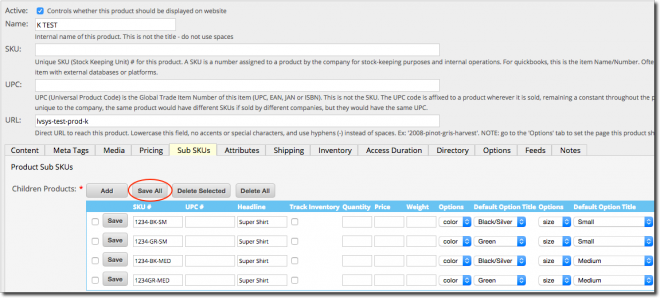
NOTE: Each product variation created in the Sub SKU tab will be generated in the list view. If you want to edit a Child Product, it must be done in the Parent Product. The Children will be edited after saving.
You can also assign multiple products to a Product Group by using the Multiple Edit feature. Simply select the six items in your product list, click Multiple Edit and add the Product Group name to the selections. See http://help.lvsys.com/training-general-using-multiple-edit for complete instructions.