You will use the Microsoft Word-like rich text editor, known as What You See Is What You Get (WYSIWYG) and pronounced wiz-ee-wig. to format and modify the text of articles, products, events, vendors and other items containing body text.
During the initial set up of your website, Style Sheets will be created to ensure a consistent look throughout. Certain formatting functions can interfere with the style sheets and should not be used. These options are highlighted in the table.
The table below presents a summary of the WYSIWYG text editor.

Line Spacing
When you press Enter after a line of text, the system inserts a double space. If you wish your next line to be single-spaced, press Shift + Enter at the end of a line of text.
To change a double spaced line to single spacing:
- Click at the beginning of the second line.
- Press Delete on the keyboard.
The lower line of text will move up and share the line above - that's ok. - Press Shift + Enter to apply a single space return
If you are satisfied with your changes, click SAVE
| Formatting Tools | Tool Uses |
|---|---|
|
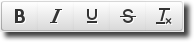
Character Formatting
|
Character formatting tools allow you apply formatting to text. Highlight the text you wish to format and click the desired tool bar button. Bold – makes selected text bold. NOTE: Always consider the options available in Styles (see below) before making changes like bolding a word or phrase. If you apply a Style to the text and later decide you want to change the style from bold to italic, for example, throughout your website, you can just modify the style and not have to make changes to every article. |
|
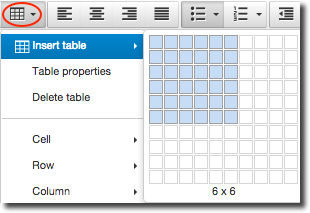
Table Tools
|
To insert a table:
|
|
Table Properties General
|
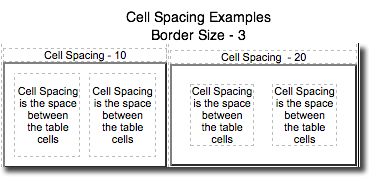
Change the formatting and alignment of individual cells with the Table Properties tool. An overview of Table Properties follows: GENERAL Width: Set the width of your table in pixels by entering a number or percent value (enter a number followed by a % symbol). The default expands to accommodate your text. Cell Spacing - Enter a smaller number for less space between the table cells
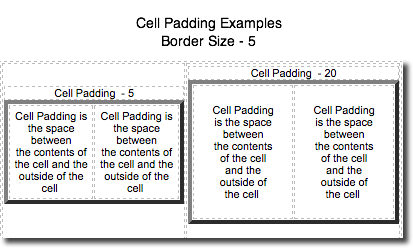
Border - Enter a number to add an outside border. i.e. 1 - for a thin border 2+ - thickness of the border increases Height: Set the table height in pixels by entering a number or percent value (enter a number followed by a % symbol). The default expands to accommodate your text. Cell Padding - Enter a smaller number for less space between the contents of the cell and the outside of the cell.
Caption - Click the box to add a caption above the table Alignment: Changes the horizontal alignment of table on the page - Center, Left or Right. |
|
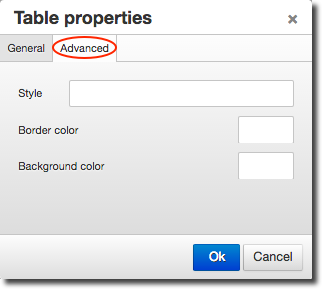
Table Properties Advanced
|
Style - Select from styles created for your website Border & Background Colors - Type a color, i.e red, blue, green, etc. or chose more specific colors from a website like this: HTML Color Codes |
|
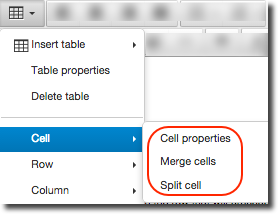
Table - Cell Split Merged Table Cells, Merge Table Cells
|
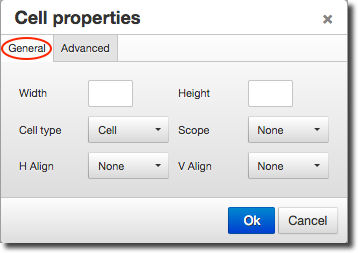
Cell Properties
Width and Height - Enter pixels Cell type - Select Cell or Header Cell H Align - Choose horizontal alignment: Left - Center - Right V Align - Choose vertical alignment: Top - Center - Bottom Click OK
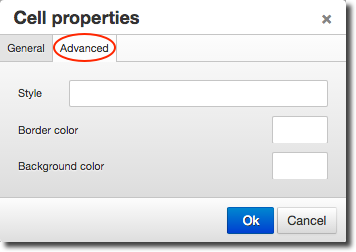
Style - Select from styles created for your website Border & Background color - Type a color, i.e red, blue, green, etc. or chose more specific colors from a website like this: HTML Color Codes Merge or Split Cells Combine two or more cells into one cell with the Merge Cells tool
|
|
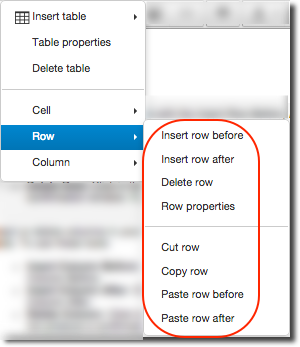
Table - Row Insert Row Before, Insert Row After, Delete Row
|
Insert or delete rows in your table with the Insert Row Before, Insert Row After and Delete Row tools. To use these tools:
|
|
Table - Column Insert Column Before, Insert Column After, Delete Column 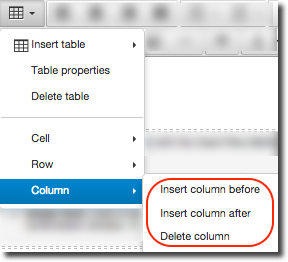
|
Insert or delete columns in your table with the Insert Column Before, Insert Column After and Delete Column tools. To use these tools:
|
|
Paragraph Alignment Tools
|
The alignment tools apply formatting to paragraphs of text. A paragraph is defined as a block of text that ends with a hard return or Enter. To align text, place your cursor in the paragraph you wish to align and click the desired toolbar button. Align left – aligns paragraph with the left margin and leaves the text on the right margin jagged. |
| Bullets
Numbering
|
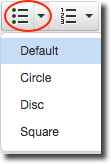
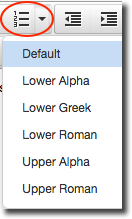
Apply bullets and numbers to text by positioning the cursor in the paragraph you wish to modify and clicking the button to apply. If you wish to add bullets or numbering to multiple lines of text, select all the text before clicking the tool button to apply. Bulleted List – Indents and bullets your paragraph of text. Click on the dropdown arrow to display the style of bullet you want to use. When you press Enter after a bulleted line, a new bulleted line is created. If you do not want a new bulleted line, position your cursor in the bulleted line and click the Bulleted List button again. Numbered List – Indents and numbers your paragraph of text. Click on the drop-down arrow to display numbering format options. When you press Enter after a numbered line, a new numbered line is created. If you do not want a new numbered line, position your cursor in the numbered line and click the Numbered List button again. |
|
Decrease Indent
|
Decrease Indent – Decreases the distance of an indent. Position your cursor in the paragraph that is indented too much and click Decrease Indent. If needed, click multiple times to continue decreasing. Increase Indent – Increases the distance of an indent. Position your cursor in the paragraph that needs to be indented more and click Increase Indent. If needed, click multiple times to continue increasing. |
|
Formats
|
Styles are pre-defined formatting options grouped into a single style. If styles are available, apply them by selecting the text you wish to change, and then click the appropriate style to apply the formatting. |
|
Paragraph
|
Use Text Levels to apply different pre-defined heading or paragraph formatting. Text levels are applied to paragraphs (blocks of text ending with a hard return/enter). Position your cursor in the paragraph you wish to modify and choose a text level to apply. DO NOT USE HEADING 1. HEADING 1 is a reserved heading important for SEO. |
|
Cut, Copy, Paste and Paste Plain Text
|
Use Cut, Copy and Paste to move text around your text fields.
You can paste text copied from most sources, but due to website template constraints, your paste may be erratic and not match the source. |
|
Undo
|
Undo – Click Undo to cancel the last action made since the last save. Saving commits the changes and deactivates Undo. Continue clicking Undo to cancel other previous changes made, since the last save. Redo – Use Redo when you wish to revert back from the last undo. If you have used Undo several times since the last save, you can continue clicking Redo to reverse the changes. |
|
Hyperlinks Tool Palette
|
Lesson 8 - Creating & Using Hyperlinks for complete instructions on creating hyperlinks, anchors and short code.
Click to insert/edit image
While the WYSIWYG Text Editor offers powerful tools for editing your website, you may sometimes need to view and edit the HTML source code directly. NOTE: Only do this if you are familiar with HTML.
|
|
Preview
|
Preview allows you to preview your work before saving. Preview provides a limited preview of your work in a pop-up window. The preview does not display your website styles or images, but does show heading levels, character formatting (italic, bold, etc) and hyperlinks |
|
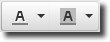
Text Color
|
Change the color of text or the block of area behind it with the Text Color and Background Color tools. To use the tools:
|
|
Insert Horizontal Line
|
Add a horizontal line to visually separate segments of your page. The Insert Horizontal Line tool inserts a line that stretches across your page. To insert a horizontal line:
|
|
Show/Hide Invisible Elements
|
The Show/Hide Guidelines/Invisible Elements tool toggles on and off to show or hide such elements as anchor tags. Click it to activate or deactivate the feature. |
|
Insert Special Characters
|
Characters and symbols, like mathematical operators and trademark symbols, are inserted by using the Insert Special Character tool. To use the tool:
|
|
Spell Checker
|
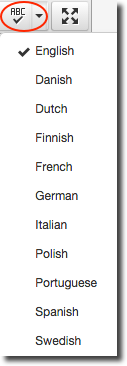
Click Spell Checker to activate it and select a language from the drop-down menu. Spell Checker will look for errors in text as you type and mark them with a red, wavy underline. You must activate the tool before entering text to search for errors. If you activate after you have entered text, it will not find errors in the text you already entered. Right click on words displaying wavy lines to view options for changing the word from a suggested list or to add the word to the internal dictionary (this is helpful for company and product names a spellchecker might not recognize). |
|
Toggle Full Screen Mode
|
Use Toggle Full Screen to expand the Text Editor to full screen. Click the button again to restore the text editor to its regular size. |